Showing posts with label alcohol ink. Show all posts

[VIDEO + GIVEAWAY] 10 Easter Egg Decorating tips you should check right now!

Hi crafty friend, Easter is almost here so today I have a new video with 10 quick egg decorating tips with crafty products I really love! Pick your fav techniques and let’s get into it! Easter is almost here and you will have so much fun with it! 


FOR THIS PROJECT I HAVE USED

 
And more. For the additional supplies with shop links visit the thumbnails below this post.

Do you enjoy this inspiration? I really appreciate if you pin this photo to your Pinterest.

VIDEO TUTORIAL


This time no card instructions on my blog, instead of it I have a video tutorial with full of tips and tricks where I am sharing 10 quick egg decorating tips with crafty products I love! You still have time to do it! If you already have your decoration done, you can still watch it for fun, and save the ideas for next year.


Watch the video above | Watch the video in HD on YouTube

GIVEAWAY


This project is part of a video hop, where we are celebrating Jessica Frost Ballas for her 10K milestone on YouTube with a huge giveaway! There are over $800 in prizes! For more information watch my video.


USED SUPPLIES

 
Using affiliate links does not mean additional costs for you. I really appreciate your support. I am using only products I LOVE. If you buy supplies through my affiliate links, you support my channel and blog with a small commission and when you shop through my links I will do a happy dance. Affiliate Disclaimer.

[Video] No laminator foiling hacks with Deco Foil Transfer Sheets


Hi crafty friend I am back with an another video tutorial, where I am showing you how can you foil easily without laminator as well as how I created these cute Lawn Fawn Halloween tags with the new Deco Foil Transfer Sheets by Therm O Web.

VIDEO TUTORIAL


If the video is not working above please open it here. If you like written tutorials more, visit my original post on the Therm O Web blog. Thank you so much for stopping by, big hugs Mona! 


USED SUPPLIES


I am using products only I LOVE. If you buy supplies through my affiliate links, you support my channel and blog with a small commission and when you shop through my links I will do a happy dance. Using affiliate links does not mean additional cost for you. I really appreciate your support. Affiliate Disclaimer here.

Spectrum Noir Illustrator Markers Used: TN7, BO3, BO1, OR2, GY3, CT4, CT3, GY2, FS7, FS6, FS3, MG1, MG3, PV3, PL3, AB1, AB3, True Black, Blender

[Video] Portrait Style Shadowbox Card | Heffy Doodle


Hi crafty friends, I am super excited to announce that I joined the Heffy Doodle Video team! Each month I will create a new cardmaking video tutorial because I have a new series, the Color it! with Mona! 


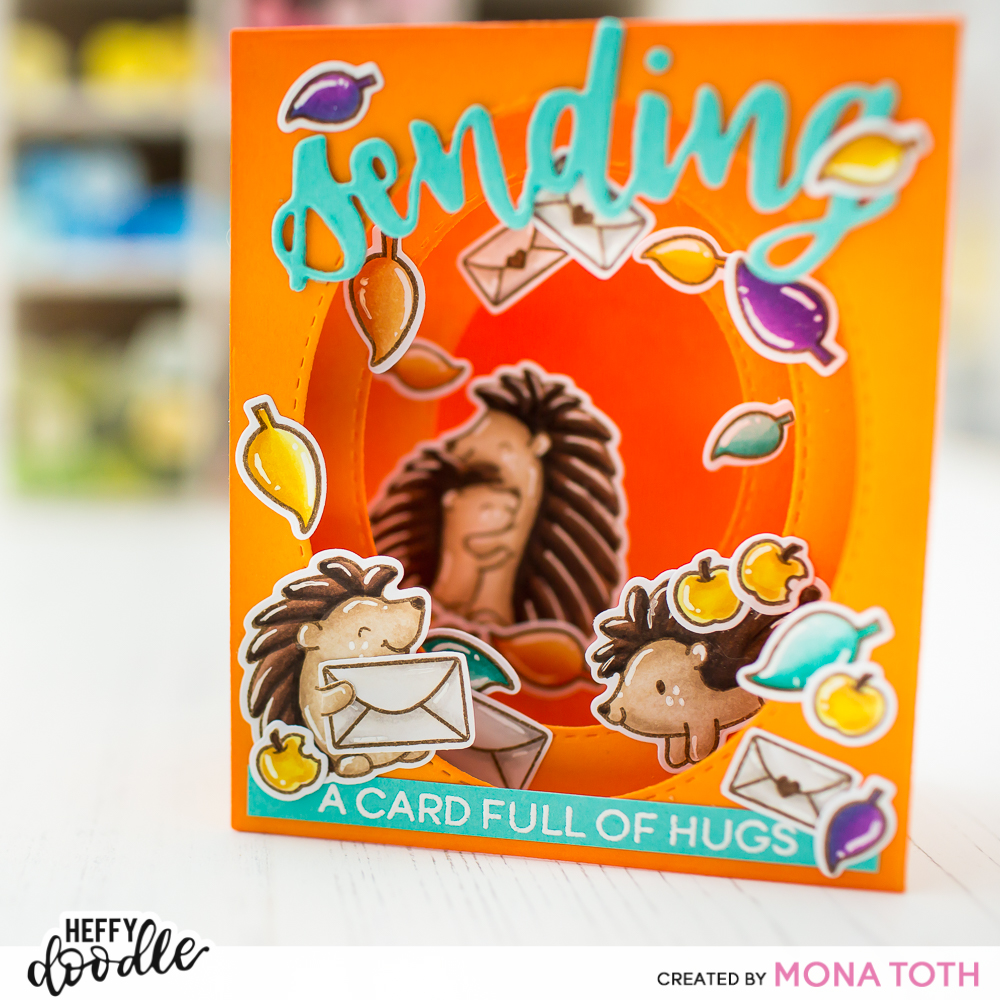
For the color inspiration for this card I have used Davina’s Halloween Color Snapshot Board. Today I am going to show you how I colored and created this portrait style tunnel shadowbox card which folds perfectly to fit an A2 envelope. Be sure to check it out, find the video here. As always the you can find the used supplies below the post. 


I started the cardmaking with stamping the images from the Quill You Be Mine, Yappy Happy Mail and the Pasta La Vista Stamp Sets. I have used the Bright White Alcohol Marker Friendly cardstock from Heffy Doodle. For the stamping I have used the dark brown alcohol marker friendly inkpad called Leather. 


When the stamping was done, after a quick heat set, I started the coloring with Spectrum Noir Illustrator Markers. For the coloring and the card making process be sure to check out the video tutorial here. Spectrum Noir Illustrator Markers Used: LV3, PL3, PV3,GY2, BO1, BO3, CT1, CT4, GY3, AB3, AB1, MB3, MB1, EB1, EB2, EB4, EB7, BG4, BG2, Blender. After the coloring I diecut the images with the Mini Die-cutting machine and added white highlights to the images with white pen. 


In the end I put my card together and the shadowbox card was done. I hope you have enjoyed my project for today, be sure to check the video for the full tutorial with the extra tips and tricks. Also I wanted to mention that check out the actual Heffy Doodle Card Challenge, you can win a generous gift certificate monthly! I recommend you to try it. it’s so much fun! See you next time, have an amazing day, Mona

VIDEO TUTORIAL


USED SUPPLIES

I am using products only I LOVE. If you buy supplies through my affiliate links, you support my channel and blog with a small commission and when you shop through my links I will do a happy dance. Using affiliate links does not mean additional cost for you. I really appreciate your support. Affiliate Disclaimer here.

Hello twenty-twenty | Scrapbook.com

Hello lovelies and welcome back on my blog and here is my first card of the year. Quick, Easy and Bright. Love it!  Today I have a step by step photo tutorial with new supplies from Scrapbook.com.


CARD TUTORIAL

Check out my step by step instructions with photos. As always you can find the used supplies below the post. 


I wanted to make a simply but bright “Happy New Year” card with the new Months & Years stamp set, together with the new foam adhesives what I got from Scrapbook.com. Follow the easy step by step instructions here:


I have used my beloved Alcohol Inks in rainbow colors to create a beautiful bright background on Yupo paper.


When it was done, I put on it a gold deco foil and wiped it with a dry cloth. When I removed the foil, I got a fabulous gold texture on my inked background.


Next, I die-cut the foam adhesive with Botanical Backdrop Die by Sunny Studio Stamps. I run it through my Die-cut machine twice (Back and Forth) and I love that it came off easily.


Next, I run the Hello die from Heffy Doodle through my Die-cut machine too, with the foam adhesive leftover and I really love that my word and the background die-cut has the same height.


In the end I stamped and heat embossed the twenty-twenty numbers from the Months & Years Stamp set by Scrapbook.com.


Thank you very much for reading through my post, I hope that you have enjoyed it and I have inspired you! For more inspiration feel free to follow me on Instagram. :)

SUPPLIES


I prepared for you the list of products which I used for making this project. If you buy these through my links you help me running this blog. (You can find the affiliate disclosure here). Thank you for your support!