Hi crafty friends! Welcome to the Heffy Doodle and Sunny Studio Stamps Collaboration Blog Hop! Design Team members from both companies are sharing inspirations using products from both companies! 😍
THIS CARD FEATURES
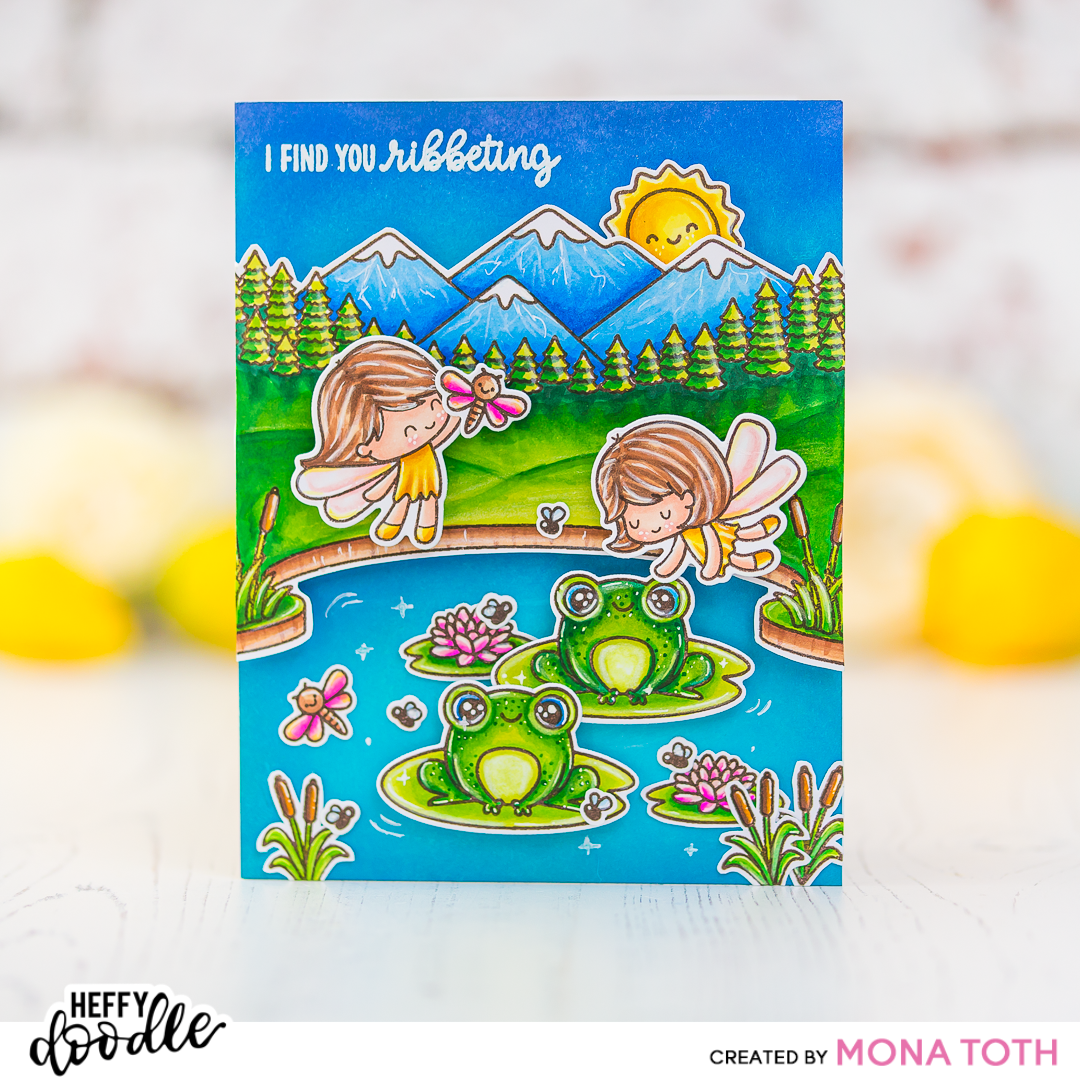
- Feeling Froggy Stamps [ SNN | SBC | SSS ]
- Absotoothly Awesome Stamps [ HFF | SBC | SSS ]
- Country Scenes Stamps [ SNN | SBC | SSS ]
- Balloon Rides Stamps [ SNN | SBC | SSS ]

I stamped the images from the above mentioned stamps with Dark Chocolate alcohol marker friendly inkpad, to achieve a softer look for the outlines. Then I made a quick heat set to prevent ink smearing and started the coloring process with Spectrum Noir Illustrator markers.

I have used the following shades: CT1, CT4, GY3, CG1, CG2, AG1, AG2, AG3, AG4, AG5, GT1, TB2, TB5, TB4, TB3,TB1, MG1, BP2, PP1, PP3, FS6, FS7, FS8, TN1, TN2, EB1, EB2, EB4, EB8, BG2, BG1, Blender.

When the coloring was done I added highlights with white pen and pencil, it’s just a nice addition to the cards. Next I die-cut and fussy-cut the images and continued with ink blending. I have used Distress Oxide inks to the sky and the pound.

Next I stamped the sentiment with watermark ink to the background, and heat embossed it with white embossing powder. In the end I put my card together with different types of adhesive. Thank you so much for stopping by, see you next time. Hugs, Mona.

GIVEAWAY
To be entered to win the giveaway, all you need to do is comment at each stop along the Blog Hop! Sunny Studio Stamps will be giving away $35 and Heffy Doodle will be giving away £25 to their respective stores! Be sure to comment before 11:59 PM on March 3rd to be entered to win! Each company will post their random winner on March 4th at 10AM EST! Make sure to check the Heffy Doodle Blog and Sunny Studio Stamps Blog to see if you’re a winner!
BLOG HOP
Heffy Doodle BlogTallie Clewley
Mayra Duran-Hernandez
Mona Toth <<< You are here
Candice Fisher
Davina Cantrell
Julia Englich
Amanda Fitterer
Handmade by Kavya
Sunny Studio Blog
Did you enjoy this inspiration? I really appreciate if you pin this photo to your Pinterest.