
Hello lovelies and welcome back on my blog. Today I have a step by step photo tutorial for you with the new exclusive clear photo-polymer stamp release from Scrapbook.com.
CARD TUTORIAL
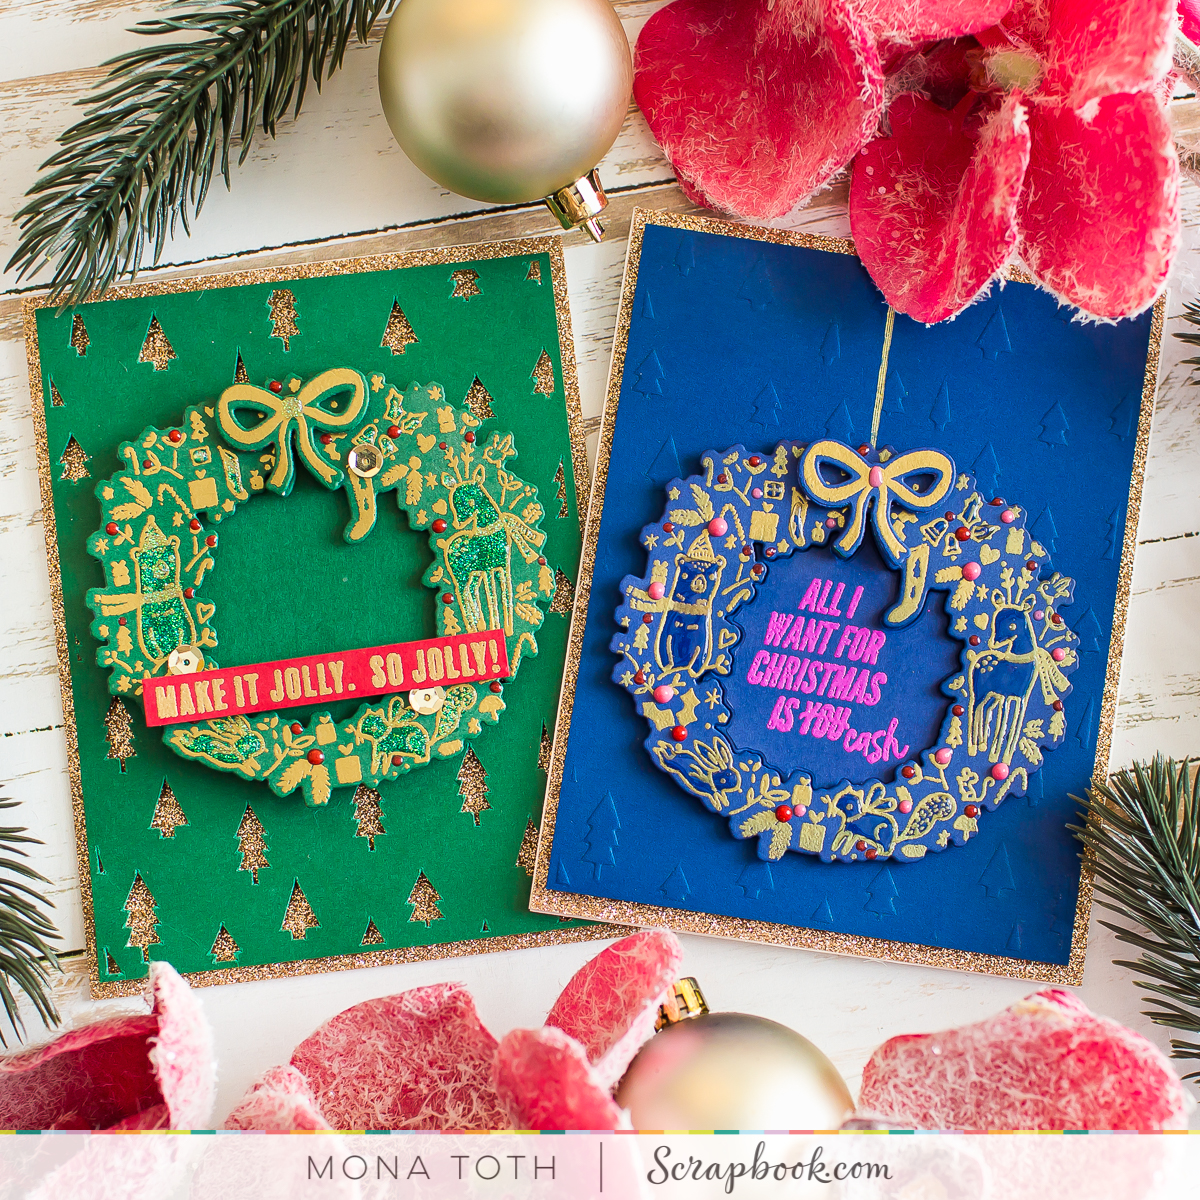
Check out my step by step instructions with photos. As always you can find the used supplies below the post. I created two simply but festive cards with the Make it Jolly sentiment stamp , follow the step by step instructions here:

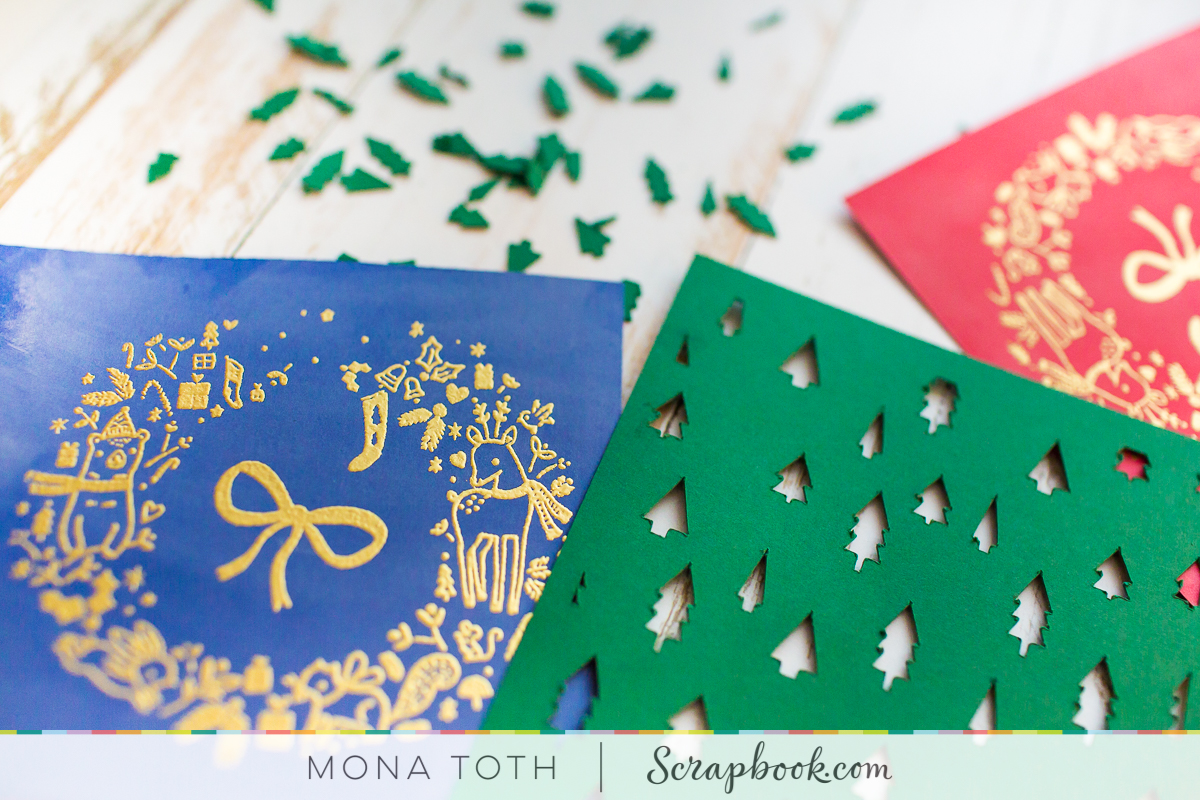
I have used the Tis the Season - Bundle Cut files with my Silhouette Cameo.

When it was done, I decided to dry emboss with it an another cardstock with my Die-cut machine and dry embossing mat.

It looks fabulous right? I thought I am going to use both of these backgrounds, and just put on it a heat embossed stamping and sentiments.
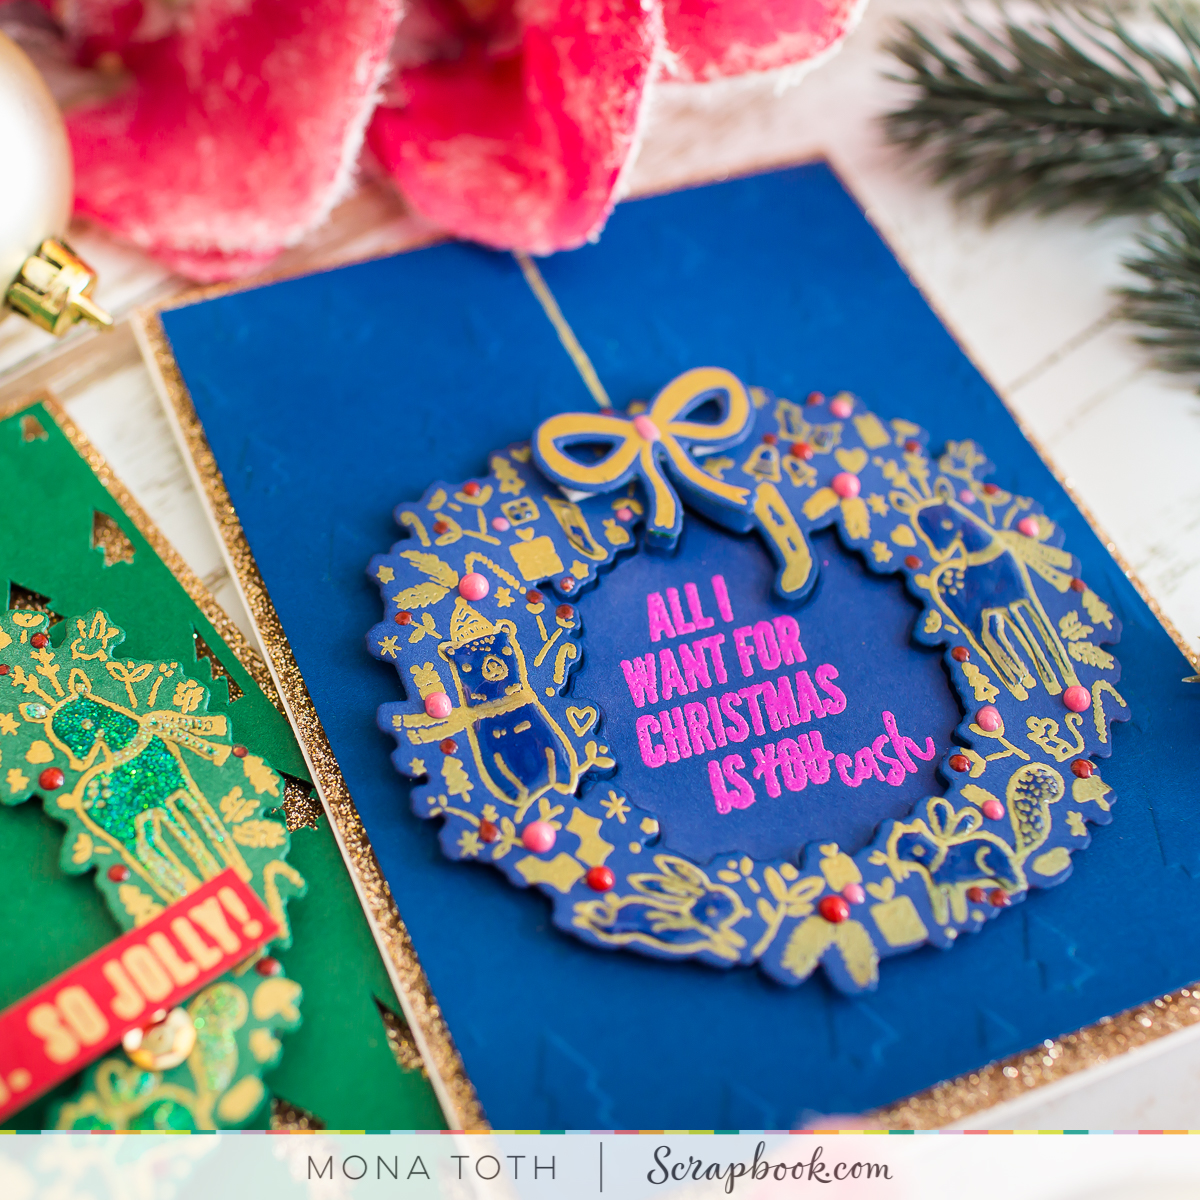
I stamped and heat embossed the Great Joy stamp sets by Pinkfresh Studio.
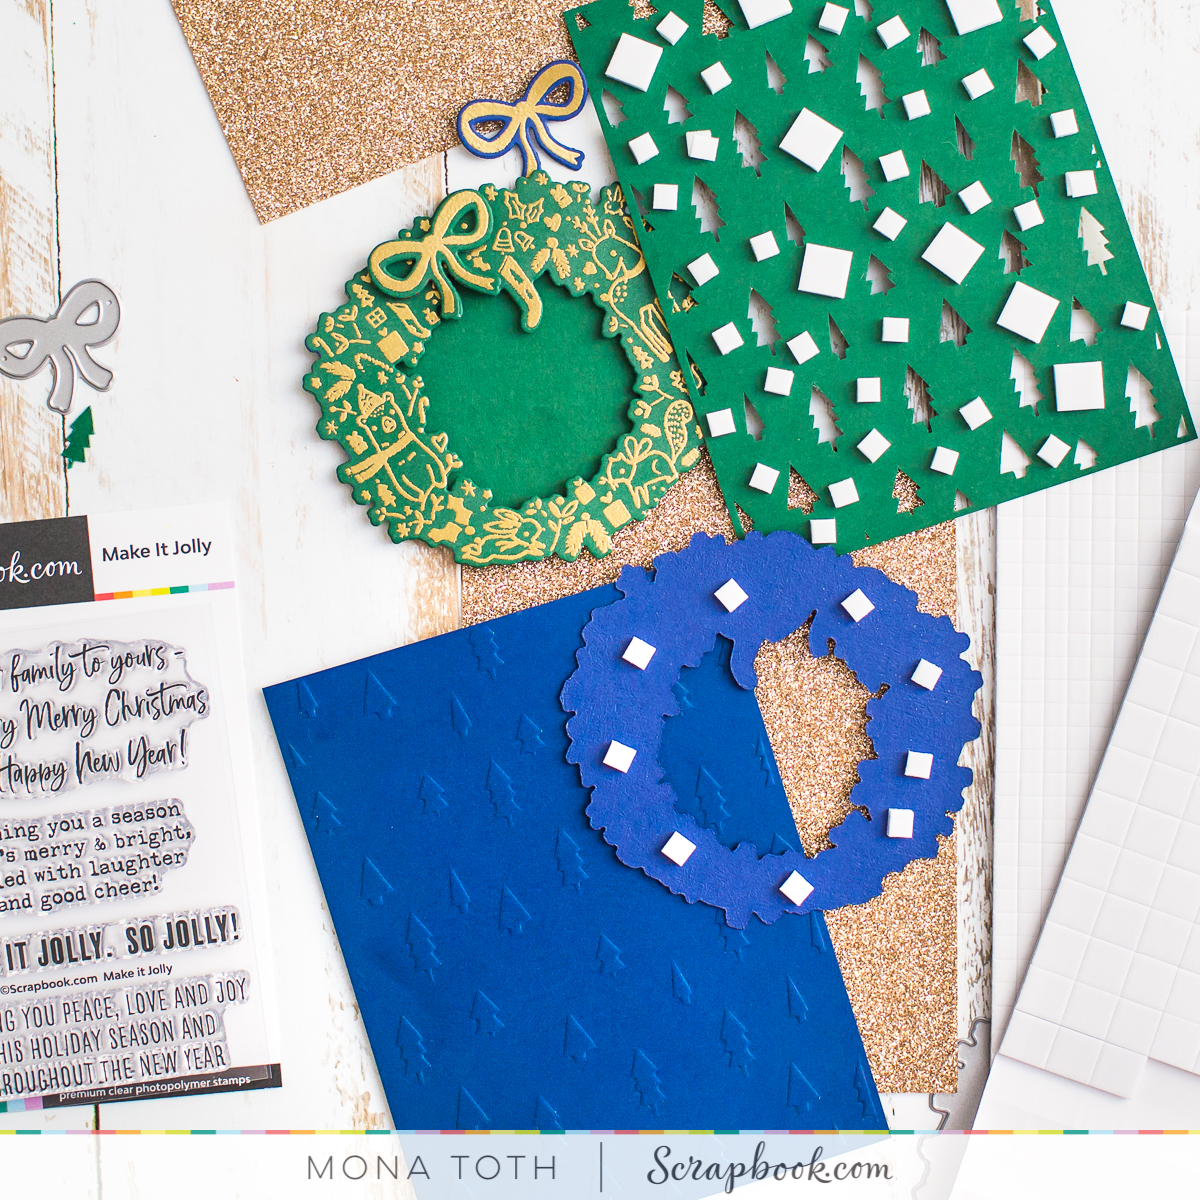
Next I die-cut the stamped images and started to put together the card. I knew that I need something sparkle to the background, so I picked the Gold Sparkle cardstock by Lawn Fawn.

Next I put 3D adhesives to the die-cuts to add my card more dimension.
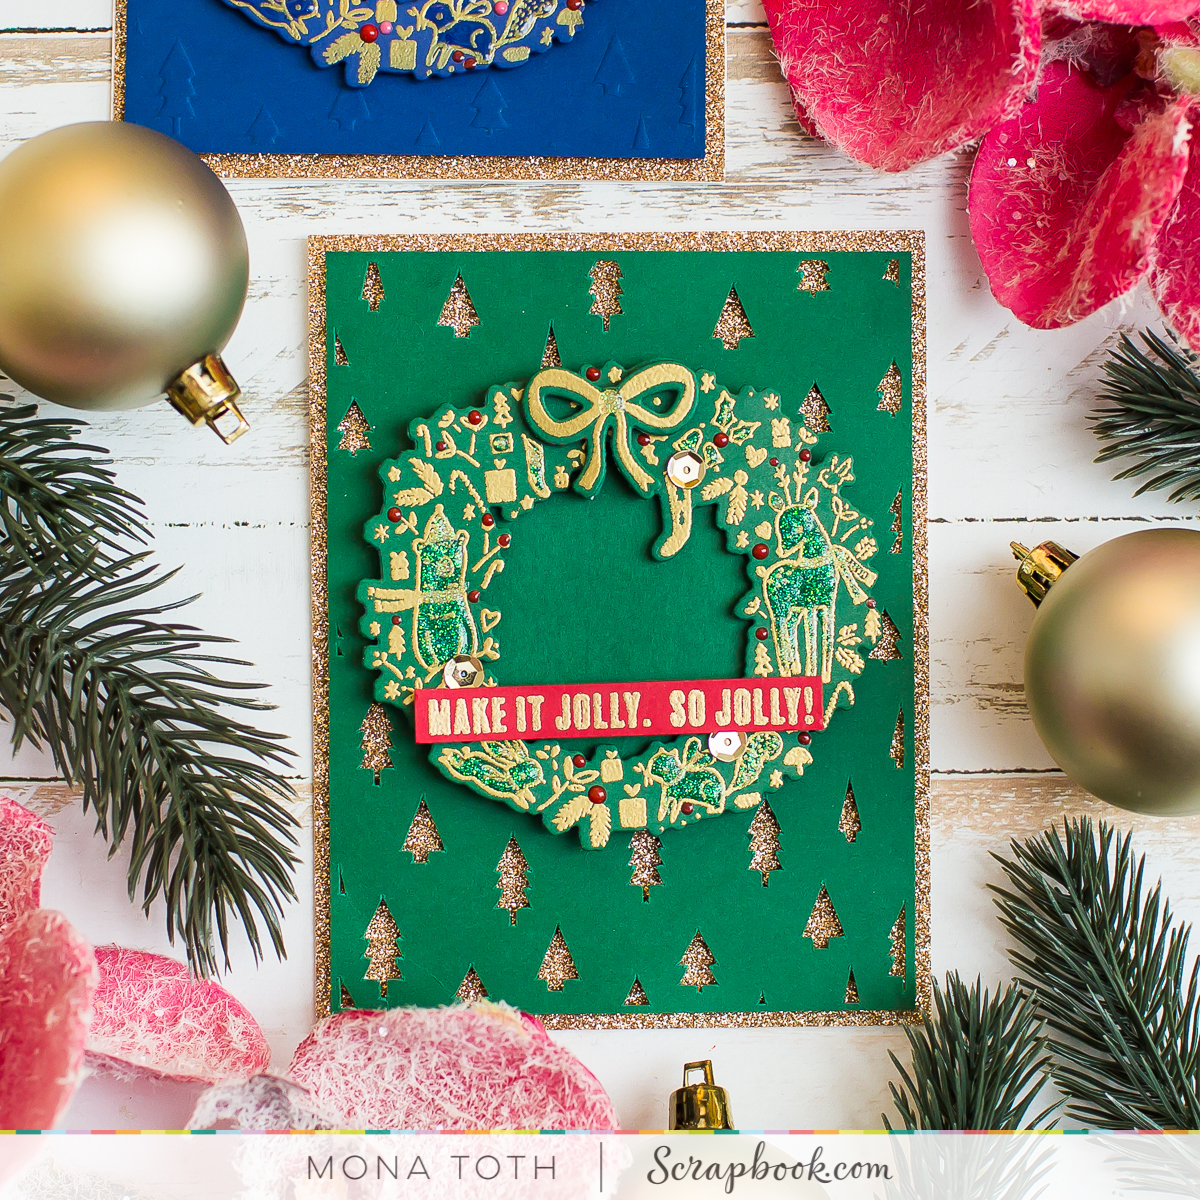
Finally I put my card together. I have added the heat embossed sentiments to their place.
In the end I embellished the critters and the heat embossed die-cut with Nuvo Jewel and Crystal Drops. In the end I have added a few sequins and my cards were ready.

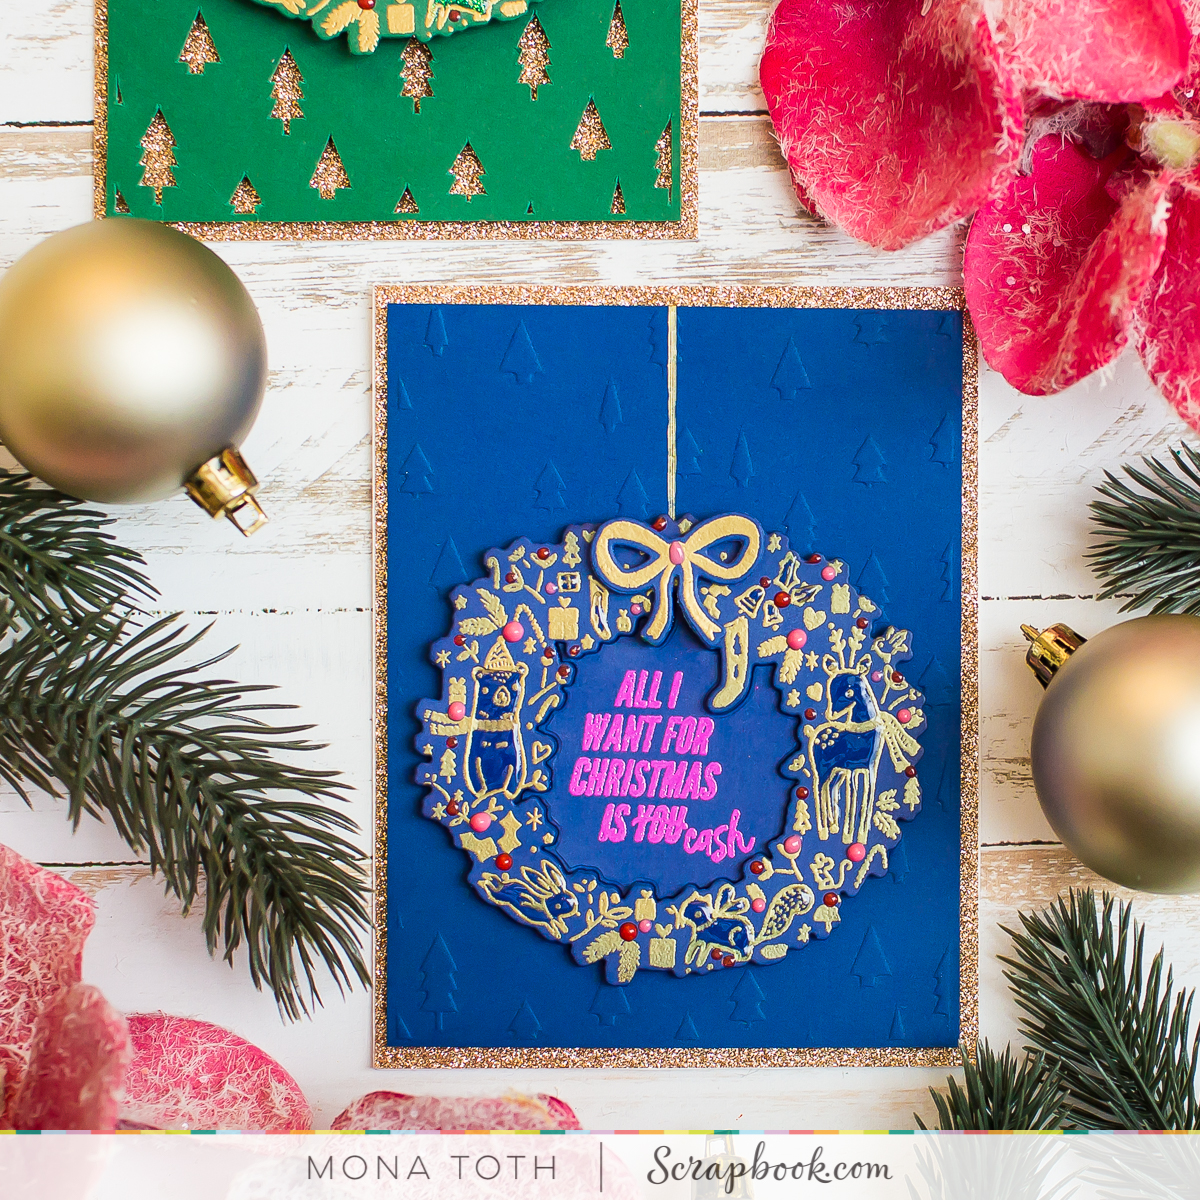
I have used the Tis the Season - Bundle Cut files with my Silhouette Cameo.
When it was done, I decided to dry emboss with it an another cardstock with my Die-cut machine and dry embossing mat.
It looks fabulous right? I thought I am going to use both of these backgrounds, and just put on it a heat embossed stamping and sentiments.
I stamped and heat embossed the Great Joy stamp sets by Pinkfresh Studio.
Next I die-cut the stamped images and started to put together the card. I knew that I need something sparkle to the background, so I picked the Gold Sparkle cardstock by Lawn Fawn.
Next I put 3D adhesives to the die-cuts to add my card more dimension.
Finally I put my card together. I have added the heat embossed sentiments to their place.
In the end I embellished the critters and the heat embossed die-cut with Nuvo Jewel and Crystal Drops. In the end I have added a few sequins and my cards were ready.
Thank you very much for reading through my post, I hope that you have enjoyed it and I have inspired you! If you like my creations let's be friends on Instagram. :)

SUPPLIES
I prepared for you the list of products which I used for making this project. If you buy these through my links you help me running this blog. (You can find the affiliate disclosure here). Thank you for your support!


No comments
Type your comment below: