Hello lovelies and welcome to the Heffy Doodle Friends Blog Hop. I am supper happy that I am a part of this hop so I made a video tutorial too with two cards including the coloring.
As always you can find the supply list below. Now let see the cards what I created and also don't forget to comment on my blog, because there is a giveaway too! Yaaay!
VIDEO TUTORIAL
If you like the text version more here you go:
First I am starting with the background. I am going to use the new Cloudy Skies Stencil from Heffy Doodle and I am going to show you a trick what I learned from Lesley, who is the owner of the heffy doodle. she is super sweet and oh so creative! I cut these small parts from the stencil, so I can put my card inside easily and make an ink blending on it.
For the ink blending first I am using the Spun Sugar Distress Oxide ink, then I continue with the Shaded Lilac color. Once the fluffy clouds are done, I need to close the sky with the top of the stencil, so I hold it in the place and starting the ink blending again. For the sky I wanted to make a little darker background so I used the Blueprint Sketch Distress Oxide with the previous ones. I added clear and white splatters on it, removed the stencil and after a quick heat embossing the background is done.
The next step was the stamping and coloring. I used the Absotoothly Awesome Stamp and dies to create the images and now I am going to make a quick coloring with my copic markers.
My used copic colors are the following:
After the coloring I created a super sweet die-cut with the Tooth Plush Die as well as Sparkle & Shine Heffy Cuts. I don't wanted to sew the cute teeth, so I run the largest part through my die-cut machine. I decided to make it from white glitter cardstock, it is really cute, shiny and sparkle. As a final touch I added cheeks to this cuteness with mini daubers and spun sugar distress oxide ink.
I adhered the background to a white cardbase with Gina K. Designs Permanent Adhesive Dot Runner. I wanted to add dimension to the Fairies and the gold coins so I used White Foam Squares from Gina K designs. I love this adhesive so much, because it's super permanent. In the end I styled and put my card together.
Hope you have enjoyed the tutorial, see you next time and good luck! Mona
SUPPLIES
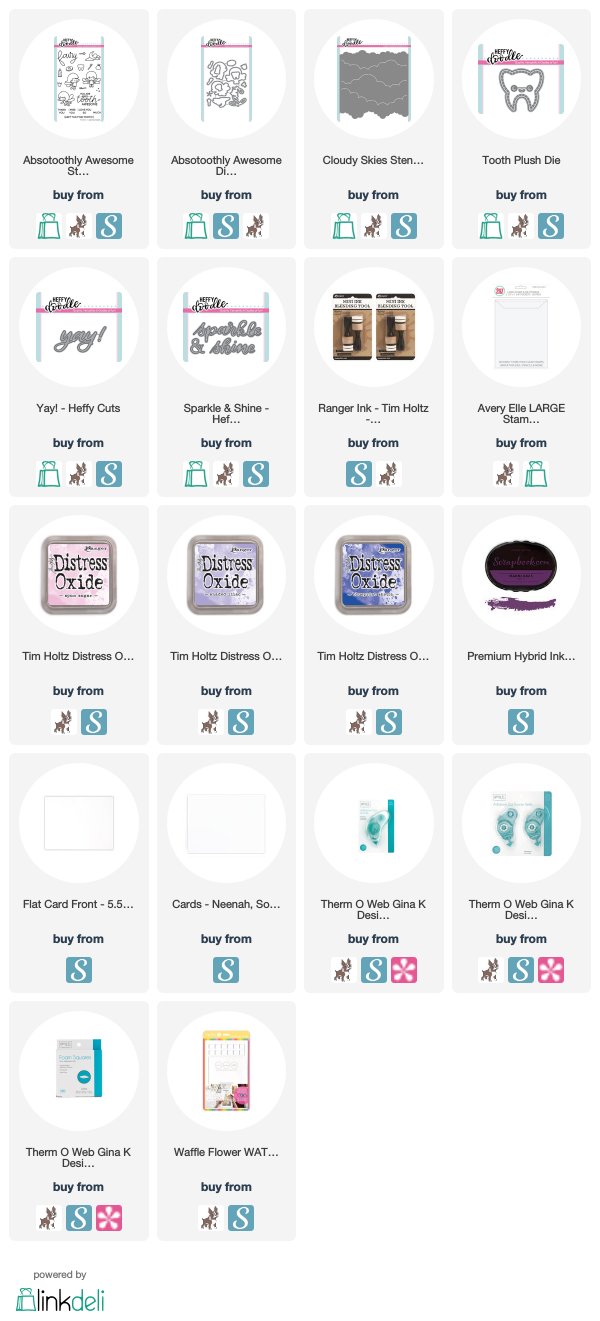
I prepared for you the list of products which I used for making this project. If you buy these through my links you help me running this blog. (You can find the affiliate disclosure here). Thank you for your support!

GIVEAWAY
The winner (chosen at random) who leaves a comment on each stop on the hop will receive a £50 voucher to the Heffy Doodle store. Winner will be announced on Monday, August 5, 2019 on the Heffy Doodle Blog.
LINE UP
PIN ME








Too cute! I Love your tooth fairy card! Great pastels! Coloring is amazing!!!!!!!!!
ReplyDeleteSuch cute tooth fairies! :) Love these cards.
ReplyDeleteSuper cute fairies and awesome work!! <3
ReplyDeleteCards so cute. Love how to add dimensions to the cards. Inspired
ReplyDeleteYour card IS SO CUTE. I love the tooth fairy theme, and the coins...just adorable!
ReplyDeleteThese are fantastic, Mona, love them both! Great designs and colouring, thanks for your inspiration!
ReplyDeleteAwww these are so cute. Love your coloring.
ReplyDeleteMona, your card is very cute. What a great bunch of characters. Your coloring brings it all to life.
ReplyDeleteSo cute! This would be perfect for my students when they lose a tooth.
ReplyDeleteAbsolutely adorable and sweet.
ReplyDeleteThe cards are darling.
ReplyDeleteGorgeous laying and shading.
these would make a fun
way for the tooth fairy
to pay for a lost tooth
thanks for sharing
txmlhl(at)yahoo(dot)com
What a delightful card - this tooth fairy card is perfect for any little recipient!!!!!!
ReplyDeleteAdorable cards with beautiful coloring! Love these sweet tooth fairies!
ReplyDeleteHow did I not know that I needed some tooth fairies in my life??
ReplyDeleteThis tooth is absolutely cute.
ReplyDeleteWhat a clever card--love it!
ReplyDeletesuper adorable and pretty cards!
ReplyDeleteSuch cute cards! I just love the little fairies and your backgrounds are gorgeous! Also love the sparkle.
ReplyDeleteYou would want to loose a tooth just to get a card like these, so pretty & sparkly. I'm having a tooth capped in August so I will forward you my address. Thank you for sharing these x
ReplyDeleteSuch a colorful and fun card!! I love your design!! It is very cute and I can imagine any child would love it!!
ReplyDeleteAdorable card. Beautiful coloring
ReplyDeleteYou took me to my childhood !! Toothfaries .. adorable cards and i loved the composition and bg a lot !
ReplyDeleteOmg... the tooth fairies!! These cards are magical.. love the colours and the whole scene!
ReplyDeleteYour cards are so fun! What gorgeous ink blending and coloring. :)
ReplyDeleteI love how you created the background! And those fairies are adorbs!
ReplyDeleteSuch pretty magical cards...adorable fairies and love the inked backgrounds you created for them.
ReplyDeleteI love your cards! So pretty!
ReplyDeleteOh my--these are so cute!
ReplyDeleteSo lovely.💙
ReplyDeleteYour cards are so cute and very magical!
ReplyDeleteHow sweet and beautiful is this card!
ReplyDeleteMarisela Delgado said: So cute. mariandmonsterd@yahoo.com
ReplyDelete